
Mastering Video Quality in After Effects
Whether you are producing videos for personal or professional use, optimizing quality is essential. Adobe After Effects is a powerful tool for motion graphics and visual effects, enabling users to enhance footage and create polished productions. This article explores effective techniques for improving video quality within After Effects.
Capturing High-Quality Source Material
The foundational first step is using a camera capable of capturing high-definition video. Footage serves as the raw material, and no amount of post-production can compensate for a low-quality source. Aim to shoot in resolutions of 1080p or 4K whenever possible. Ensure your camera settings are optimized for quality over file size. Proper lighting is also crucial - avoid backlighting and situations where subjects are silhouetted or in shadows. Well-lit scenes allow more flexibility and quality when color grading later. Always review footage right after capturing to check for issues like over or underexposure that require reshooting. High-quality source material provides the best base for enriching video quality within After Effects.
Color Correction and Exposure Adjustment
The visual impact and realism of video comes down to color and lighting. After Effects offers precise tools for optimizing these elements. Select the footage layer and apply the Lumetri Color effect for powerful color grading controls. Adjust colors individually or apply Look presets for pre-baked styles. Exposure settings enable altering brightness without impacting other tones. Adjust highlights and shadows to reveal detail while achieving balanced contrast. White and black points ensure full use of the color range without clipping. Finely tuned color correction transforms dull or unnatural footage into a visually compelling product.
Reducing Noise and Grain
Low light scenes often come with unwanted digital artifacts like noise and grain. Plug-ins designed for reducing these issues can significantly improve quality. Optical Flares contains presets that mimic lens characteristics like glow, flares and glare, which can disguise noise. The Neat Video plug-in uses advanced noise profiling and noise reduction algorithms to analyze each frame and remove noise while preserving details and edges. For particularly noisy footage, apply Neat Video as an adjustment layer clipped to the affected area. With the right tools, even low-quality low-light shots can be salvaged and polished to a high standard.
Stabilizing Shaky Footage
Shaky, unstable footage is difficult for viewers to watch and breaks immersion. After Effects’ built-in Warp Stabilizer analyzes movement between frames and applies stabilizing corrections. Enable the Analyze Forward and Backward options for the most accurate stabilization. The Auto-Orientation feature detects natural vertical or horizontal shifts. Adjust Stabilization Level and Smoothness to achieve smooth, steady movement without artificial artifacts. Stabilization transforms distracting footage into silkysmooth, watchable scenes that enhance production quality.
Refining Sharpness and Details
Soft, pixelated video lacks visual pop and fails to engage audiences. Add sharpness judiciously using techniques like Unsharp Mask or the Sharpness effect. Unsharp Mask increases contrast along detail edges to make textures stand out without amplifying noise. Adjust the Amount slider subtly to avoid a processed “sharpening halo” effect. For a natural approach, select the Smart Sharpen effect and tweak the Amount, Radius and Threshold settings together. Enhancing fine image details through sharpening livens up dull footage and boosts overall visual perception of quality.
Animating with Motion Blur
Perception of quality improves when motion looks natural and fluid rather than robotic or stilted. The Motion Tile effect applies motion blur based on speed to smoothly render fast-paced action realistically. Adjust Shutter Angle, Shutter Phase and Shutter Scale as needed for the desired blur. For example, increase Shutter Angle for faster subjects or movements to convey a sense of dynamism. Motion blur maintains a filmic quality even with quick edits by emulating the way the world appears through a physical camera system. It enhances realism and viewer engagement in every scene.
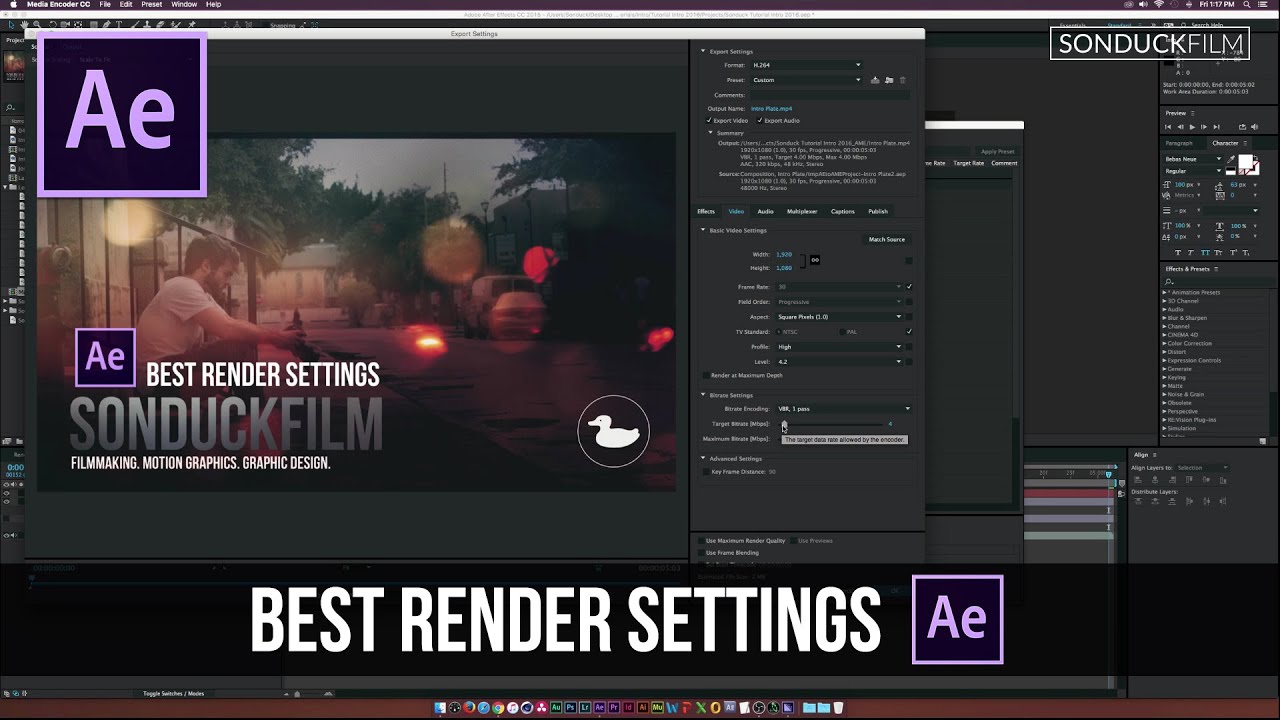
Output for Top Quality Delivery
After refining color, exposure, stabilization and more, the final export settings seal quality. H.264 is suitable for web delivery while HEVC/H.265 excels for 4K output with excellent quality/file size balance. Render at full resolution and high bitrates for optimal appearance. Additionally, applying scaling, noise reduction, and Sharpness adjustments as a final step before encoding can boost sharpness within rendering limitations. For physical distribution, ProRes or DNxHD/HR allow high-fidelity archiving. With careful output settings, the full potential of video quality enhancements shines through for every audience.
